When you want to stand out with your eye makeup, you'll be hard pressed to create a better makeup look than a smoked out cat eye. The combination of deep eye shadow, smoky effect and dramatic eyeliner with raised lashes immediately draws attention to your eyes.
So if you want to go out for a night and want to look your best, try a smoked out cat eye. Don't worry if this isn't a look you've mastered, below we're sharing 10 steps to creating the perfect smoked out cat eye.
Step #1: Apply primer to your eyes
If you're going to be wearing a lot of eye makeup, like you're going to be doing with a smoked out cat eye, eye primer is an absolute must. Otherwise, your eyeshadow and eyeliner will likely wear off throughout the day. So before you start applying the rest of your eye makeup, apply a thin layer of primer to your lids.
Step #2: Strategically place duct tape
Not confident in your ability to create a cat eye shape? Well, no need to worry, all you'll need is a little tape to get it right. Place a piece of tape diagonally, with one end at the outer corner of the eye and the other at the tail of the eyebrow. The tape will serve as a kind of pattern, helping to keep the eye makeup in the desired shape.
Step #3: Apply your skin tone eyeshadow all over
It's time to move on to applying eyeshadow, but don't jump right into applying dark colors on your lids. Instead, use a matte, flesh-toned eye shadow as a base. This will help the rest of the eyeshadow blend better, making the extra step worthwhile. Choose the shade that best matches your skin tone and apply it from the lid to the brow bone.
Step #4: Blend the gray tones onto the lids
This is where the smoking part comes into play. You will need two gray eyeshadows, one darker than the other, to create a subtle gradient. Place your lighter gray on the inner half of your lids and your darker gray on the outer half, making sure to blend them together in the middle.
Step #5: Add black to the outer corner
A real smokey cat eye needs black eyeshadow too! Deepen your look by applying dark powder to the outer corner. Then, blend, going directly over the piece of tape.
Step #6: Smoke the lower lash line
You cannot leave your lower lashes completely bare. Bring down the black eyeshadow, smudging the bottom of your lashes.
Step #7: Brighten your inner corner
Wearing dark colors can make your eyes look smaller. For an eye-opening effect, you should emphasize the inner corners of your eyes. Instead of reaching for a standard highlighter, use a silver eye brush.
Step #8: Apply eyeliner
Now, you can put all your shadows aside and deal with the brush. Draw along the upper lash line, then add a wing. Once again, you can use the tape as a guide to ensure your cat eye stays sharp.
Step #9: Finish with some mascara
Your look won't be complete without a coat or two of mascara. Curl your lashes, then sweep on a few coats of volumizing mascara for extra length and hold.
Step #10: Cleanse under your eyes
A side effect of applying a bunch of eyeshadow is fallout. At this point you might look like a raccoon, with dark eyeshadow dusted around the under-eye area. Thankfully, there's an easy fix. Wet a cotton pad with cleansing water and wipe away the eyeshadow or powder that falls. Once your under eye area is clean, apply a little concealer to cover any imperfections.
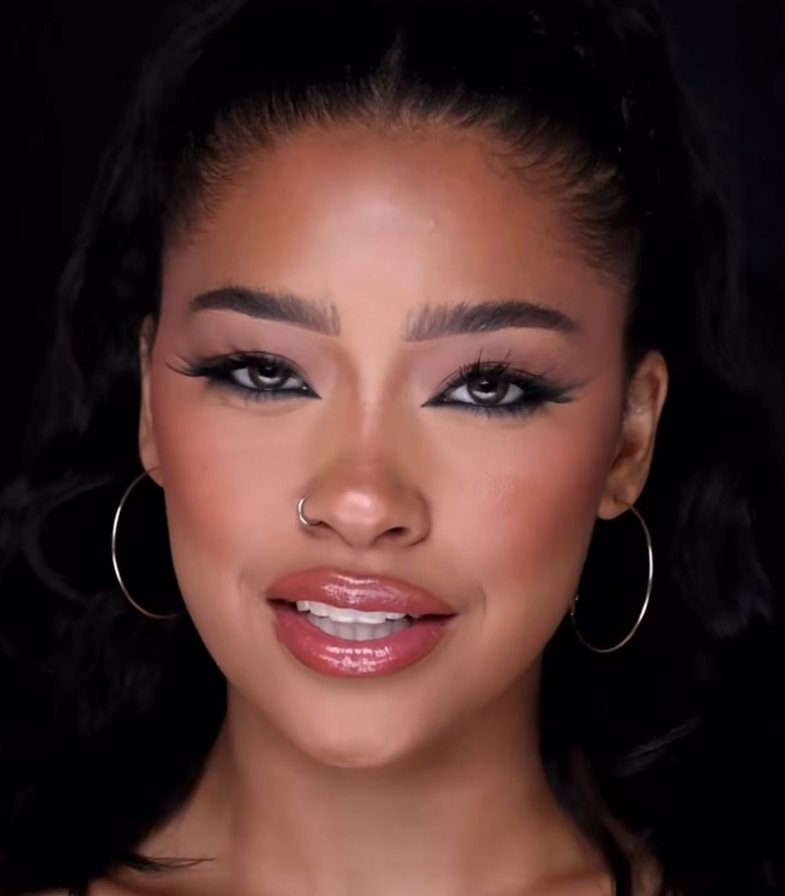
The final image should look like this:
View this post on Instagram